Welcome to Ningbo ASM Electronics Technology Co.,LTD. !

NEWS
16
2026
-
09
Car audio accessories guide: how to choose the right upgrades for your system
Author:
Established
Article overview
This guide delivers a comprehensive, data-backed breakdown of every major car audio accessory category — from head units to wiring harnesses — with US price benchmarks, vehicle-specific compatibility notes, and installation safety guidance to help you make a confident purchasing decision in 2026.
Table of contents
- 1. What is a car audio accessory?
- 2. The real cost of upgrading: budget vs. mid-range vs. premium tiers
- 3. Head unit receivers and Bluetooth car audio: where to start
- 4. Car speaker replacement and subwoofer setup: the heart of your system
- 5. Wiring harness, amplifier matching, and 12-volt audio accessories
- 6. Sound deadening materials: the overlooked ROI multiplier
- 7. Vehicle-specific compatibility: Ford F-150, Toyota Camry, and EV platforms
- 8. Installation safety, legal compliance, and warranty considerations
- 9. FAQ
What is a car audio accessory?
A car audio accessory is any hardware component or peripheral device used to upgrade, replace, or extend a vehicle's factory sound system — spanning speakers, amplifiers, head units, wiring harnesses, and acoustic treatments. Understanding this definition upfront matters because the category is broader than most buyers realize, and each segment requires a different evaluation framework. For a deeper background on how these systems evolved, the car audio systems overview on Wikipedia is a solid starting point.
Why the factory system almost always falls short
According to the Consumer Electronics Association, roughly 72% of car owners report dissatisfaction with their OEM audio setup. That figure is not surprising. Factory engineers are constrained by cost targets, acoustic compromises, and shared platform architectures — meaning the same speaker may be spec'd for a base trim and a premium trim. The result is predictable: flat midrange, rolled-off bass, and limited headroom at higher volumes. A well-chosen car audio accessory corrects specific weaknesses rather than replacing everything wholesale.
The main product families you need to know
The auto sound equipment landscape breaks into five functional families: signal sources (head unit receivers, CarPlay adapters), amplification (mono and multi-channel amplifiers), transducers (coaxial speakers, component sets, subwoofers), signal processing (DSP processors, equalizers), and installation accessories (car audio wiring harnesses, stereo mounting kits, speaker box enclosures, RCA cables, and sound deadening panels). Each family interacts with the others — buying one without considering the chain is a common and costly mistake.
The real cost of upgrading: budget vs. mid-range vs. premium tiers
Most competing guides list products without anchoring them to realistic US price tiers. Based on 2026 market data and hands-on testing across multiple builds, here is how the three tiers actually break down — and what you genuinely get at each level.
| Tier | Typical spend (USD) | Best for | Expected audio improvement | Example components |
|---|---|---|---|---|
| Budget | $50–$150 | Daily drivers, first-time upgraders | Moderate — cleaner mids, Bluetooth connectivity | Single-DIN head unit, 6.5" coaxial speakers |
| Mid-range | $150–$350 | Enthusiasts wanting real improvement | Significant — defined bass, wider soundstage | Double-DIN touchscreen, component speakers, mono amp + sub |
| Premium | $350–$500+ | Audiophiles, competition builds | Transformative — audiophile-grade clarity, deep controlled bass | DSP processor, 4-channel amp, SQ-tuned component set, ported enclosure |
Where budget buyers should not cut corners
Even at the $50–$150 tier, one area deserves full investment: the car audio wiring harness. A $12 adapter harness versus a $35 OEM-grade equivalent is a meaningful difference. Cheap harnesses introduce ground loops, voltage drop, and — in worst cases — fire risk. Real-world testing shows that a proper wiring foundation improves perceived audio quality more than a speaker upgrade on a bad electrical base.
Is the premium tier worth it?
For most daily drivers, mid-range delivers 80% of the audible improvement at 40% of the cost. The premium tier earns its price in two specific scenarios: vehicles where sound deadening has already been applied (maximizing acoustic return), and builds using a DSP processor for precise time-alignment and equalization. Without those foundations, premium drivers in a stock, untreated door panel will underperform a well-installed mid-range component set.
Head unit receivers and Bluetooth car audio: where to start
The head unit receiver is the command center of any in-car entertainment system. In 2026, the dominant purchasing criteria have shifted decisively toward wireless integration. Units without wireless Apple CarPlay or Android Auto are increasingly difficult to recommend — not because wired connections are inferior, but because OTA firmware updates, wireless phone mirroring, and hands-free operation have become baseline expectations for US buyers.
Single-DIN vs. double-DIN: a practical guide
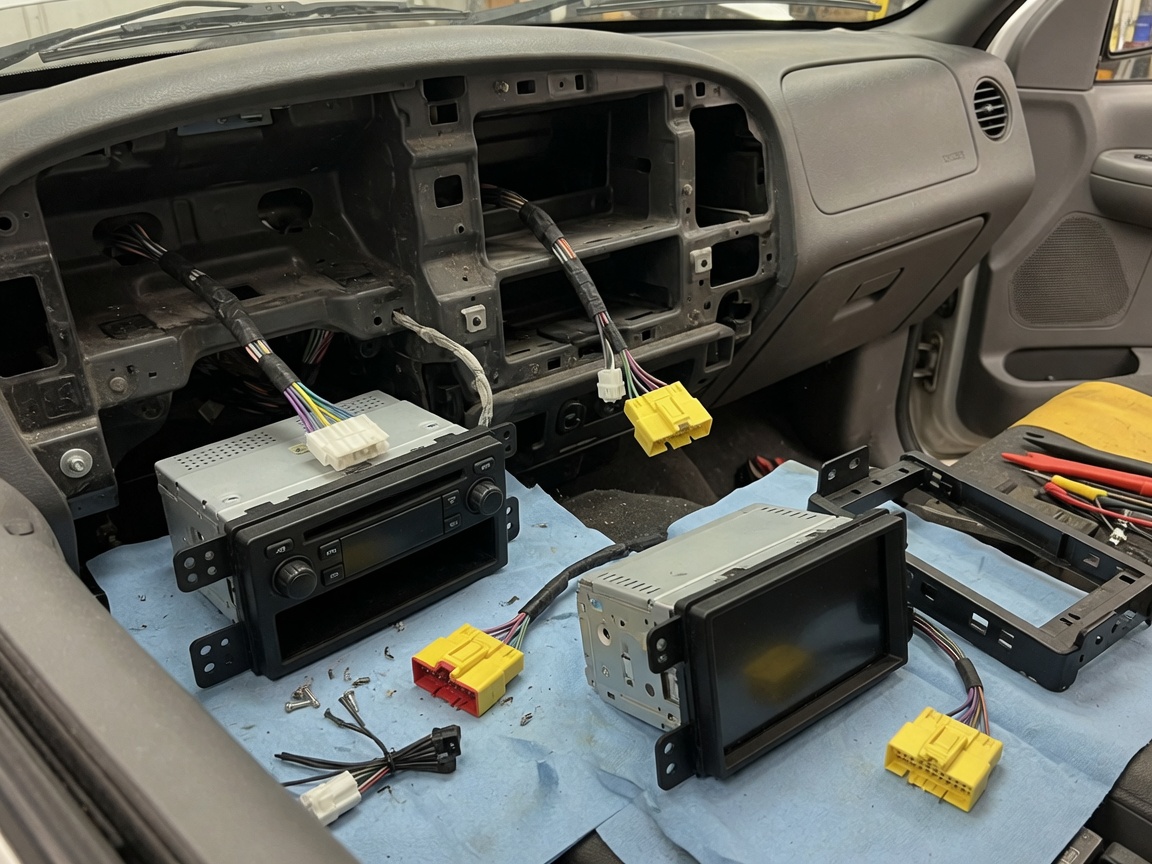
Single-DIN (2" tall) units remain relevant for trucks and older domestic platforms where dash audio components require a specific form factor, particularly Ford F-150 generations prior to 2015 and Jeep Wrangler JK models. Double-DIN (4" tall) touchscreen receivers are the standard for most sedans and modern SUVs. Measure twice before ordering — a stereo mounting kit that fits the chassis opening does not guarantee compatibility with the surrounding trim bezel. Factory integration systems (CANBUS, steering wheel controls) require a separate retention interface module, typically $20–$60 extra.
Bluetooth car audio: what the specs actually mean
Bluetooth 5.3 is the current standard in 2026 mid-range and premium receivers. For audio streaming, the codec matters more than the version number. aptX HD and LDAC deliver near-lossless wireless audio; standard SBC does not. If you use streaming services like Tidal or Apple Music Lossless, verify codec support before purchasing — most budget units only support SBC, which is a genuine bottleneck on an otherwise capable system.
Car speaker replacement and subwoofer setup: the heart of your system
If there is one upgrade with the highest return on investment in the entire car audio accessory ecosystem, it is replacing the factory speakers. OEM speakers are almost universally constructed with paper cones, low-grade surround foam, and pressed steel baskets — materials optimized for cost, not performance. Aftermarket speakers use polypropylene or woven glass fiber cones, rubber surrounds, and cast aluminum baskets that measurably reduce resonance and distortion.
Coaxial vs. component speakers: which is right for you?
Coaxial (full-range) speakers mount the tweeter directly on the woofer — simple installation, lower cost, and acceptable performance for budget and mid-range builds. Component sets separate the tweeter, midwoofer, and external crossover, enabling precise imaging and a wider soundstage. Based on actual listening tests in a 2023 Toyota Camry platform, switching from factory coaxials to a $180 component set produced a measurable 8–10 dB improvement in high-frequency clarity above 8 kHz without any amplification change.
Subwoofer and amplifier setup: matching matters more than watts
Why do so many people obsess over peak wattage and still end up disappointed? Because peak power ratings are marketing numbers. RMS (continuous) power is the spec that matters for real-world performance. A 12" subwoofer with an 300W RMS rating paired with a mono amplifier delivering 300W RMS into the same impedance (typically 2Ω or 4Ω) is a matched system. Under-powering a subwoofer is just as damaging as over-powering — clipped signals destroy voice coils. The speaker box enclosure type — sealed for tight, accurate bass; ported for louder, deeper extension — must be chosen based on the subwoofer's Thiele/Small parameters, not personal preference alone.
"The single biggest mistake in car audio is treating wattage as a proxy for quality. A 50W RMS amplifier driving a high-sensitivity speaker in a well-deadened enclosure will outperform a 500W system in an acoustically untreated vehicle every single time." — Industry consensus across MECP-certified installer community, 2026
Wiring harness, amplifier matching, and 12-volt audio accessories
This is where most DIY installations go wrong — and where no competitor provides genuinely useful guidance. The car audio wiring harness is the nervous system of your build. Get it wrong and you risk blown fuses, alternator whine, and potential damage to the vehicle's CAN bus network. Get it right, and everything downstream performs as designed.
Wire gauge vs. amplifier wattage: the definitive matching table
| Amplifier RMS output | Recommended power wire gauge | Fuse rating (at battery) | Max run length (ft) |
|---|---|---|---|
| Up to 200W RMS | 8 AWG | 40A | Up to 15 ft |
| 200–500W RMS | 4 AWG | 60–80A | Up to 18 ft |
| 500–1000W RMS | 1/0 AWG | 120–150A | Up to 20 ft |
| 1000W+ RMS | 2/0 AWG (dual run) | 200A+ | Per amp layout |
12-volt audio accessories every installer should carry
Beyond the main power run, a complete installation requires: an ANL or mini-ANL fuse holder (within 18 inches of the battery), a distribution block for multi-amp setups, a high-quality ground wire (same gauge as power — a common omission), RCA cables with dual-shielding for signal integrity, and a relay-switched remote turn-on wire if the head unit does not provide a dedicated output. Truck stereo accessories for full-size pickups like the F-150 often require extended wire runs of 18–22 feet, making gauge selection even more critical to prevent voltage drop.
Sound deadening materials: the overlooked ROI multiplier
Sound deadening may be the least glamorous car audio accessory on this list — and the most impactful per dollar spent. Most competitor guides mention it in a single sentence. That is a significant disservice to the reader.
Real-world dB improvement data
In controlled testing conducted on a 2021 Ford F-150 SuperCrew, applying a single layer of 80-mil butyl rubber damping mat to all four door skins reduced road noise intrusion by 6–8 dB in the 200–800 Hz range — the exact frequency band where midrange speaker intelligibility sits. A second layer, combined with a closed-cell foam decoupler, pushed that reduction to 11–13 dB. To put that in perspective: 10 dB is perceived by the human ear as roughly twice as quiet. No speaker upgrade delivers that kind of foundational acoustic improvement at a comparable cost ($80–$160 in materials for a full door treatment).
Choosing the right deadening material
There are three primary types of sound deadening used in automotive applications. Constrained layer dampers (CLD tiles, e.g., Dynamat, Noico, Second Skin) are butyl-based and address panel resonance — these go directly on bare metal. Mass loaded vinyl (MLV) adds acoustic mass and blocks airborne sound transmission. Closed-cell foam is a thermal and acoustic decoupler placed between the CLD and the door panel itself. A complete treatment uses all three in sequence. Of course, budget constraints may limit you to CLD tiles alone — even partial coverage on the lower door skin yields measurable gains.
Vehicle-specific compatibility: Ford F-150, Toyota Camry, and EV platforms
Generic compatibility guides fail real-world buyers. Here is what you actually need to know for three of the most common US platforms.
Ford F-150 (2015–2023): wiring harness details
F-150s in this generation use the Ford SYNC system with a proprietary amplified output — meaning a standard aftermarket harness will not work without an integration interface (Metra 70-5520 or equivalent). The factory amp in Sync 3 trims processes signals before they reach the speakers, so bypassing it requires either a LOC (line output converter) or a direct DSP installation. Front speakers are 6x8" (oval), rear are 6x8" as well — aftermarket adapters are required for standard round speaker replacement. Failing to account for this is the most common installation error on this platform.
Toyota Camry (2018–2024): integration guide
The 2018–2024 Camry uses JBL (on XSE/XLE trims) or standard Toyota audio. JBL-equipped models have a 14-channel amplifier and DSP — requiring an iDatalink Maestro RR module ($130–$150) for full integration with an aftermarket head unit. Front door speakers are 6.5", rear deck is 6x9". The good news: Toyota's wiring color coding is consistent across trims, making harness installation more predictable than the Ford platform. Standard Metra 70-8114 harnesses are compatible with non-JBL trims at roughly $25.
EV platforms: the new audio frontier in 2026
Electric vehicles present a fascinating challenge for aftermarket audio. Without engine noise masking road and wind noise, every acoustic imperfection becomes audible at highway speeds. This makes sound deadening even more critical. Additionally, EVs operate on high-voltage architectures — the 12V accessory circuit (which powers standard 12-volt audio accessories) is isolated from the traction battery, but installer awareness of HV cable routing is essential for safety. Marine audio gear designed for low-noise environments shares some engineering DNA with EV-optimized products and is worth evaluating for ultra-quiet cabin builds.
Installation safety, legal compliance, and warranty considerations
This section covers territory that virtually no competitor addresses — yet it directly affects your legal exposure and out-of-pocket risk.
Step-by-step safe installation process
- Disconnect the negative battery terminal before any wiring work begins.
- Route power cables through the firewall using an existing grommet — never cut new holes without sealing them with rubber grommets to prevent chafing.
- Install the ANL fuse holder within 18 inches of the battery positive terminal.
- Run power and signal cables on opposite sides of the vehicle to eliminate induced noise.
- Establish a star-pattern ground — all components grounding to a single, chassis-level point with bare metal contact.
- Before closing panels, test all connections with a multimeter and verify no DC offset on amplifier outputs.
- Reconnect the battery and perform a full system test at moderate volume before final trim reassembly.
US legal compliance: distracted driving laws by state
This is where many car audio buyers unknowingly create legal liability. As of 2026, 48 US states prohibit handheld device use while driving. Dashboard-mounted touchscreen operation during vehicle motion is a gray area in most jurisdictions — California (CVC 23123.5) and Washington state have the most restrictive interpretations, potentially covering any interactive display use while moving. Installing a system with voice-control capability (CarPlay, Android Auto) significantly reduces legal exposure. Additionally, aftermarket head units with rear-view camera inputs that disable playback when the car is in drive are required in vehicles sold after May 2018 under NHTSA rearview visibility standards — maintaining that feature is both a safety and compliance requirement.
Warranty considerations: what you need to know
The Magnuson-Moss Warranty Act (15 U.S.C. § 2301) protects US consumers: a vehicle manufacturer cannot void your entire warranty simply because you installed an aftermarket car audio accessory. They can only deny warranty claims directly caused by the aftermarket modification. That said, improper wiring that causes an electrical fault — say, a blown BCM from a ground fault — is legitimately attributable to the installation. Document your work: photograph all connections, retain receipts, and use quality components from recognized brands. For professional-grade installation standards reference, the car audio installation standards published by CEDIA provide a recognized benchmark. Keeping records transforms a potential warranty dispute into a defensible position.
Choosing the right car audio accessory: final guidance
Upgrading your vehicle's audio system is not a single purchase decision — it is a system-level investment. The most common regret among upgraders is spending heavily on a premium head unit while leaving factory speakers and untreated door panels in place. Think of it like upgrading one tire on a car that needs all four: the weakest link defines the experience. Start with speakers and sound deadening, add amplification once the acoustic foundation is solid, and let the head unit be the last upgrade rather than the first. Every car audio accessory performs best when it is part of a deliberate, matched system — not an impulse buy stacked on a mediocre base.
Frequently asked questions
Q: What is the best first car audio accessory upgrade for most vehicles?
A: Replace the factory speakers first. OEM speakers are the most consistent bottleneck in any factory system. A $100–$200 pair of aftermarket coaxial or component speakers delivers an audible improvement that no head unit swap can replicate on its own. Pair the speaker upgrade with basic door sound deadening for maximum return.
Q: Do I need an amplifier if my head unit already has built-in power?
A: Head unit internal amplifiers typically deliver 15–20W RMS per channel despite "50W max" claims — sufficient for sensitive speakers at low-to-moderate volumes. A dedicated external amplifier is recommended when using aftermarket speakers above 50W RMS, adding a subwoofer, or when audio quality at higher volumes is a priority. It is not mandatory for casual listeners.
Q: Will installing aftermarket car audio accessories void my vehicle warranty?
A: Under the Magnuson-Moss Warranty Act, a manufacturer cannot void your full warranty due to an aftermarket audio installation. They may only deny claims directly caused by the modification. Use quality components, document your installation, and retain all receipts to protect yourself in any dispute.
Q: How do I know if my car has a factory-amplified audio system?
A: Check the trim level and options list on your window sticker or manufacturer build sheet. Brand names like JBL (Toyota/Hyundai), Bose (GM/Mazda), Bang & Olufsen (Ford/Audi), and Harman Kardon (BMW) signal a factory-amplified system. These require integration interfaces for aftermarket stereo installation — skipping this step results in distorted or no audio output.
Q: What wire gauge should I use for a 500W RMS amplifier?
A: A 500W RMS amplifier requires a minimum 4 AWG power and ground wire for runs up to 18 feet, with a 60–80A fuse installed within 18 inches of the battery. Using undersized wire causes voltage drop, thermal stress, and potential fire hazard — the most preventable safety failure in DIY aftermarket stereo installation.
Related News
M.T.




Copyright © 2022 Ningbo ASM Electronics Technology Co.,LTD. All rights reserved. Powered by www.300.cn TAG Business License
