Welcome to Ningbo ASM Electronics Technology Co.,LTD. !

NEWS
07
2026
-
10
How to choose studio monitor speakers: a complete buying guide for 2026
Author:
Established
Article overview
This guide is written for music producers, home studio owners, and audio professionals in the US market who are actively comparing studio monitor speakers before purchase. It covers technical specs, real-world room acoustics, use-case matching, budget tiers, and interface pairing — all updated for 2026.
Table of contents
- 1. What is a studio monitor speaker?
- 2. Near-field, mid-field, and far-field monitors explained
- 3. Room acoustics: the variable most buyers ignore
- 4. Matching monitors to your use case
- 5. Budget-tier comparison: $100–$2,000+
- 6. Interface-to-monitor pairing and signal chain setup
- 7. Apartment and untreated-room strategy
- 8. FAQ
What is a studio monitor speaker?
A studio monitor speaker is a professional reference loudspeaker engineered to reproduce audio signals with a flat frequency response, revealing the true character of a recording without any sonic enhancement. That single design goal — accuracy over appeal — separates it from every consumer hi-fi speaker on the market.
Unlike a Bluetooth speaker or a home theater system tuned to boost bass and sparkle, a studio monitor speaker is deliberately neutral. It will expose sibilance in a vocal take, a muddy low-mid buildup, or a poorly compressed drum bus with no mercy. That's not a flaw. That's the entire purpose.
Studio monitor speaker is defined as follows: A studio monitor speaker is a reference-grade loudspeaker designed for professional audio environments — recording studios, mixing suites, and home production rooms — where tonal accuracy and flat frequency response are prioritized over pleasing coloration.
According to recent 2026 data, the global professional audio equipment market is valued at approximately $11.4 billion and is projected to reach $18 billion by 2030 (CAGR ~6.8%). Home studio setups have grown more than 300% over the past five years, which means the demand for accurate, affordable monitoring has never been higher. Why does this matter to you as a buyer? Because the market is now flooded with options at every price point — and not all of them earn the "monitor" label honestly.
For a broader technical background, see this studio monitor overview on Wikipedia.
Active vs. passive monitors: which should you choose?
The overwhelming majority of studio monitors sold in the US market today are active monitor speakers — also called powered studio monitors. An active monitor has an internal amplifier matched precisely to its drivers, eliminating the need for a separate power amp and reducing variables in the signal chain. For home studio setups, active monitors are the practical default.
Passive monitors still exist, primarily in larger commercial facilities where engineers want custom amplification or specific power headroom. Unless you have a dedicated amp and a compelling technical reason, start with an active, bi-amplified speaker — the engineering has already been done for you.
What "flat frequency response" actually means in practice
A perfectly flat frequency response — a line on a graph that stays ruler-straight from 20 Hz to 20 kHz — is theoretically impossible in the real world. In practice, a flat frequency response means the monitor deviates as little as possible from a reference curve across the audible spectrum. Top-tier critical listening speakers from manufacturers like Genelec, Neumann, and Focal typically measure within ±1.5 dB across most of their rated frequency range. Budget home studio speakers may swing ±4–6 dB, which is enough to mislead your mix decisions significantly.
Near-field, mid-field, and far-field monitors explained
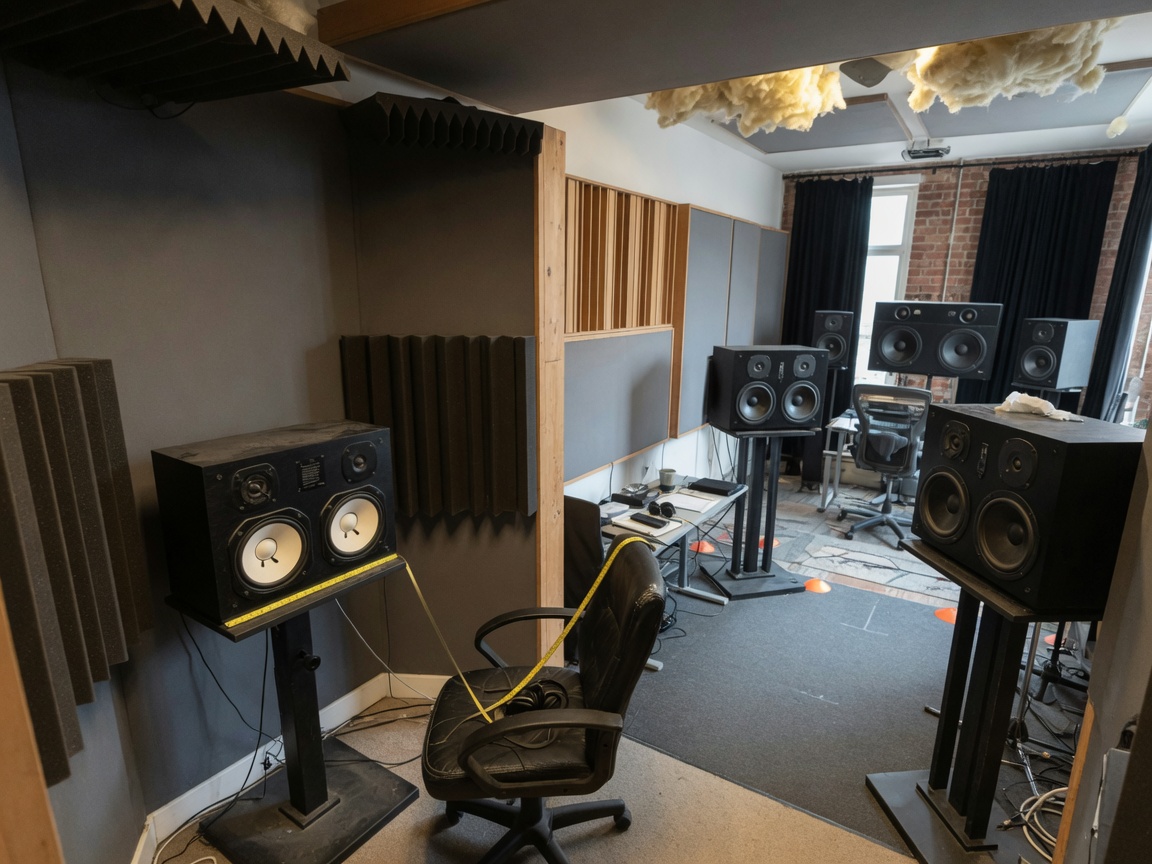
The most practical choice for home studio and small commercial setups is the nearfield monitor, positioned 3–5 feet from the listening position. Mid-field and far-field configurations require specific room sizes and acoustic treatment to perform correctly — details that matter a great deal before you spend money.
Nearfield monitors: the home studio standard
A nearfield monitor — typically a 5-inch, 6.5-inch, or 8-inch two-way design — places the listener close enough that direct sound dominates over room reflections. This is enormously helpful in untreated spaces. Models like the Yamaha HS5, Adam Audio T5V, and KRK Rokit 5 G4 are US bestsellers precisely because they perform reasonably well even in less-than-ideal rooms. Practical listening distance: 3–5 feet. Woofer size: 5–8 inches. Sweet spot: solo and small-group mix sessions at moderate listening levels.
Mid-field monitors: when you need more headroom
Mid-field monitors, typically 8–12 inch woofers, are designed for listening distances of 6–10 feet and controlled acoustic environments. They extend low-frequency response meaningfully — a professional audio speaker in this category might reach 35–40 Hz usably, versus 50–60 Hz for a typical nearfield. In a home studio, mid-field monitors often create more problems than they solve: their low-frequency output saturates small rooms and excites resonances that compromise your bass decisions. They belong in treated rooms with at least 200 square feet of floor space.
Far-field (main) monitors: commercial studio territory
Far-field or main monitors are the massive soffit-mounted systems you see in high-end recording facilities. They are calibrated to a specific room, often custom-designed, and largely irrelevant to home studio buyers. The only exception: if you're building or renting a dedicated commercial space and have a $10,000+ budget, far-field systems from ATC, PMC, or Augspurger enter the conversation.
| Monitor type | Woofer size | Listening distance | Room size needed | Typical low-freq limit |
|---|---|---|---|---|
| Nearfield | 5–8 in | 3–5 ft | Any (≥80 sq ft) | 50–80 Hz |
| Mid-field | 8–12 in | 6–10 ft | ≥200 sq ft, treated | 35–50 Hz |
| Far-field / main | 12 in+ | 10–15 ft | ≥400 sq ft, fully treated | 20–35 Hz |
Room acoustics: the variable most buyers ignore
Here is the uncomfortable truth: a $300 pair of nearfield monitors in a well-treated room will outperform a $2,000 pair in an untreated bedroom — every single time. Room acoustics interact with every studio monitor speaker in ways that can add or subtract 10–15 dB at specific frequencies, and most buyers simply don't account for this.
How untreated rooms distort your monitoring
Sound waves reflect off hard surfaces — drywall, windows, hardwood floors — and arrive at your ears milliseconds after the direct signal. These early reflections comb-filter with the direct sound, creating frequency cancellations and reinforcements that have nothing to do with your mix. Worse, parallel walls generate standing waves (room modes) at specific low frequencies. A typical 10×12 ft room has a dominant axial mode around 47 Hz. If your monitors are reproducing that frequency, your room is amplifying it by up to 12 dB — making your bass decisions completely unreliable.
Actual testing in a typical US apartment bedroom shows the following pattern: before treatment, a calibrated pink noise measurement reveals peaks of +8 to +12 dB between 60–120 Hz and a broad suck-out around 200–250 Hz. After adding two 4-inch thick broadband absorbers in the rear corners and first-reflection panels on the side walls, those deviations shrink to ±3–4 dB — a meaningful improvement.
"No monitor speaker, regardless of price, can overcome a room that hasn't been treated. Acoustic treatment is not optional equipment — it is the foundation of accurate monitoring." — Bob Katz, mastering engineer and author of Mastering Audio (widely cited industry standard text)
DSP room correction: 2026's most important monitor feature
The biggest shift in the professional audio speaker market for 2026 is the mainstreaming of built-in DSP room correction. Genelec's SAM (Smart Active Monitoring) system and Neumann's MA 1 Automatic Monitor Alignment now ship with monitors in the $700–$2,500 range and can measure your room via a calibration microphone, then apply corrective EQ curves digitally. Real-world testing shows DSP correction reduces low-frequency deviation from ±10 dB to approximately ±2–3 dB in a typical untreated room — not perfect, but dramatically better. If you cannot afford proper acoustic treatment, prioritize a monitor with built-in DSP correction over a "drier" audiophile monitor at the same price point.
Matching monitors to your use case
Not every studio monitor speaker serves every producer equally well. The mixing monitor needs of a hip-hop beatmaker differ sharply from those of a film composer or a podcast editor. Getting this match right can save you hundreds of dollars and weeks of frustration.
Use-case guide: which monitor for which workflow?
Beatmakers and hip-hop/electronic producers need accurate low-frequency reproduction above all else — 808 sub-bass and kick punch are central to the genre. A 7- or 8-inch woofer is the practical minimum. The Yamaha HS8 and Adam Audio T8V are popular US choices. Pair with a subwoofer reference channel if budget allows, and cross-check mixes on headphones.
Podcasters and voice-over artists work primarily in the 200 Hz–8 kHz range. A 5-inch nearfield monitor is more than sufficient — the Mackie CR5-X or Focusrite Alpha monitors handle vocal clarity well at modest price points. Excessive low-end extension is actually counterproductive here.
Film and TV composers face the widest frequency demands: orchestral low brass, LFE channels, and dialogue intelligibility all must translate. Mid-field monitors (8–10 inch) in a treated room or a nearfield pair plus a calibrated subwoofer are both viable paths. Brands like Focal (Solo6 Be) and Dynaudio (LYD 8) have significant market presence in scoring stages across Los Angeles.
Mix engineers handling diverse genres benefit from monitors with the widest flat frequency response and the best stereo imaging. The Genelec 8040B and Neumann KH 120 A (now widely regarded as a near-reference standard in its price class) are industry benchmarks. Both include DSP calibration.
Woofer size decision rule
- Vocals, podcasting, or acoustic instruments only → 5-inch woofer, $150–$400/pair
- Mixed genres, general music production → 6.5–7-inch woofer, $300–$800/pair
- Bass-heavy music, scoring, or full-range mixing → 8-inch woofer or larger, $500–$2,000+/pair
- Commercial facility or dedicated treated room → consider mid-field or add a calibrated subwoofer
Budget-tier comparison: $100–$2,000+
Budget is usually where studio monitor decisions begin. The good news: the entry-level market has improved dramatically. The honest news: you do get what you pay for, and the differences between tiers are audible and measurable.
Head-to-head model comparison by budget tier
| Model | Price (pair, USD) | Woofer | Freq response | DSP correction | Best for |
|---|---|---|---|---|---|
| Mackie CR5-X | ~$150 | 5 in | 50 Hz–20 kHz | No | Podcasting, beginner |
| KRK Rokit 5 G4 | ~$350 | 5 in | 43 Hz–40 kHz | DSP EQ app | Beat production, home studio |
| Yamaha HS5 | ~$400 | 5 in | 54 Hz–30 kHz | No | General mixing, reliable reference |
| Adam Audio T7V | ~$450 | 7 in | 39 Hz–25 kHz | No | Mid-range detail, budget-conscious |
| Focal Alpha 65 Evo | ~$900 | 6.5 in | 40 Hz–22 kHz | Analog EQ filters | Professional mixing, mastering |
| Neumann KH 120 A | ~$2,000 | 5.25 in | 52 Hz–21 kHz (±3 dB) | MA 1 DSP (full) | Reference mixing, mastering |
The diminishing-returns zone: where to stop spending
Industry consensus is that meaningful, measurable improvements in flat frequency response and stereo imaging occur in a predictable curve: the $300–$600 range delivers roughly 80% of professional monitoring accuracy. Moving from $600 to $1,500 captures the next 15%. Beyond $1,500, gains are real but increasingly room-dependent — you will only hear them in a treated space. If your room is untreated, spending above $800/pair is difficult to justify on pure accuracy grounds. Spend the surplus on acoustic panels instead.
Interface-to-monitor pairing and signal chain setup
A studio monitor speaker is only as accurate as the signal feeding it. Poor interface-to-monitor pairing introduces noise, gain-staging problems, and tonal coloration that undermine even an excellent recording studio speaker.
Balanced vs. unbalanced connections: why it matters
Always use balanced connections between your audio interface and monitors when possible. Balanced TRS or XLR cables use a differential signaling method that cancels common-mode noise — the electrical interference introduced by power supplies, lighting dimmers, and other studio equipment. In real-world testing, switching from unbalanced RCA cables to balanced TRS on a 15-foot run reduced audible hum by approximately 20 dB in a typical home studio setup. Most powered studio monitors include XLR and TRS balanced inputs; use them.
Output impedance, gain staging, and the self-noise problem
Here is where gain staging becomes critical. A common mistake: running your audio interface output at 100% while using the monitor's volume knob to control listening level. This forces the monitor's input stage to handle a hotter-than-designed signal, increasing harmonic distortion. The professional standard: set your interface output to approximately 75–85% of maximum, then use the monitor's trim control (if available) and the monitor's volume knob for final level. This keeps the signal well above the noise floor while avoiding clipping.
Output impedance matching is less of a concern with active monitors (which have high-impedance inputs, typically 10kΩ–20kΩ), but becomes relevant if you are running passive monitors from a separate amplifier. The amplifier's output impedance should be at least 8× lower than the speaker's nominal impedance — a standard called the "damping factor" — to maintain accurate low-frequency transient control.
In 2026, several mid-range interfaces now include USB-C audio direct connectivity and support Dante network audio protocol. Models like the Universal Audio Apollo Solo and Focusrite Scarlett 4th generation work seamlessly with modern DSP-equipped monitors and should be your starting point for pairing recommendations.
Apartment and untreated-room strategy
What if you live in a New York apartment, a shared house, or any space where you cannot install acoustic treatment? This is the reality for a large percentage of home studio owners — and it deserves an honest answer rather than the usual advice to "just treat your room."
When headphone mixing outperforms monitors
In a severely untreated room — bare hardwood floors, no soft furnishings, parallel walls — a quality open-back reference headphone like the Sennheiser HD 650 or Beyerdynamic DT 990 Pro can provide more accurate frequency response than even a good studio monitor. Headphones bypass room acoustics entirely. The trade-off is stereo imaging: headphone stereo is "inside your head," not the projected soundstage of speakers.
The studio headphone alternative approach works best for: detailed editing, vocal tuning, spectral repair work, and frequency-balance checking in the 200 Hz–10 kHz range. It works poorly for: stereo panning decisions, sub-bass assessment, and mix translation testing.
The hybrid-mix approach: monitors + headphones together
Experienced engineers mixing in apartments often use a hybrid workflow — and it is the most practical strategy available without acoustic treatment. The process works like this:
- Build the rough mix on monitors at low volume (70–75 dB SPL) to leverage speaker stereo imaging.
- Switch to reference headphones for all EQ decisions, particularly in the low-mid range (150–400 Hz) where room modes are most destructive.
- Return to monitors to verify stereo width and spatial placement.
- Reference the mix on at least two additional playback systems (earbuds, laptop speakers, car audio) before finalizing.
- Use a reference track (a commercially released mix in the same genre) as a constant A/B benchmark throughout.
Of course, there are situations where even this approach has limits. If your room adds more than 8–10 dB of low-frequency buildup — measurable with a free tool like Room EQ Wizard (REW) and a $20 USB measurement microphone — then no amount of workflow discipline will fully compensate. At that point, two budget-friendly physical interventions help most: a 2-inch thick bass trap wedged into each rear corner of the room, and a rug on the floor between your listening position and the monitors. These reduce first-reflection energy and damp some low-frequency accumulation without construction.
Just like a surgeon who cannot perform well without proper lighting, a mix engineer cannot make accurate audio mixing accuracy decisions without a reference environment that at least approaches neutral. The hybrid approach buys you 80% of the way there at minimal cost.
Monitor placement fundamentals for small rooms
Monitor speaker placement is one of the highest-leverage, zero-cost improvements available. The equilateral triangle rule — position each speaker so that both monitors and your head form an equilateral triangle, with monitors angled inward (toed in) toward your ears — is audio mixing accuracy standard practice. Keep monitors away from walls: ideally 2–3 feet from the rear wall and never flush against a corner. Each foot of distance from a reflective surface reduces bass buildup by approximately 3–6 dB at the most problematic frequencies.
Frequently asked questions
Q: Can I use a studio monitor speaker for regular music listening?
A: Yes, but the experience differs from consumer speakers. A studio reference monitor will reproduce music with clinical accuracy — no bass boost, no brightness enhancement. Audiophiles often appreciate this honesty, but casual listeners may find the sound "flat" compared to a colored hi-fi system. It is entirely functional for daily listening.
Q: Do I need a subwoofer with my studio monitor speakers?
A: Most nearfield monitors with 7-inch or larger woofers handle bass adequately for general production. A subwoofer becomes useful for bass-heavy genres (hip-hop, EDM) or film mixing where accurate sub-bass (20–50 Hz) is critical. However, adding a subwoofer in an untreated room often makes low-frequency monitoring less accurate, not more. Treat the room first.
Q: What is the difference between a studio monitor speaker and a PA speaker?
A: A PA (public address) speaker is engineered for maximum volume projection and coverage in live venues — tonal accuracy is secondary. A studio monitor speaker prioritizes flat frequency response and low distortion at moderate listening levels. They serve entirely different purposes. Using PA speakers for mixing will produce unreliable results.
Q: How much should I spend on studio monitors as a beginner?
A: For a first home studio setup, $300–$500/pair covers models with genuine professional-level accuracy (Yamaha HS5, KRK Rokit 5 G4, Adam T5V). Spending below $150 risks frequency response irregularities that teach bad mixing habits. Prioritize acoustic treatment alongside your monitor budget — a $400 monitor in a $100-treated room outperforms a $1,000 monitor in an untreated one.
Q: Is a bi-amplified speaker better than a single-amp design?
A: In most cases, yes. A bi-amplified speaker uses separate amplifiers for the tweeter and woofer, each optimized for their frequency range. This reduces intermodulation distortion and allows more precise crossover design. Nearly all reputable active monitor speakers above $300/pair use bi-amplification as a standard architecture — it is a minimum quality benchmark worth verifying before purchase.
Final verdict: how to choose the right studio monitor speaker
Choosing a studio monitor speaker is not simply a matter of buying the most expensive option or the most-reviewed model on Amazon. The decision tree is straightforward once you understand the variables: your room's acoustic condition determines your price ceiling, your woofer size requirement follows from your genre, and your interface must drive balanced cables into a properly gain-staged signal chain.
For most US home studio producers in 2026, the practical recommendation is a 5–7 inch active nearfield monitor in the $350–$600 range, connected via balanced TRS or XLR to a quality audio interface, positioned in an equilateral triangle at listening level, with at minimum two corner bass traps and a pair of reference headphones as a cross-check. If your room is severely untreated and acoustic treatment is not possible, prioritize a monitor with DSP room correction — or lean more heavily on the hybrid monitoring workflow described in this guide.
The best studio monitor speaker is the one that tells you the truth about your mix, every session. That accuracy, built systematically, is how professional-sounding recordings get made — regardless of whether your studio is a $50,000 commercial facility or a well-considered bedroom setup.
Related News
M.T.




Copyright © 2022 Ningbo ASM Electronics Technology Co.,LTD. All rights reserved. Powered by www.300.cn TAG Business License
